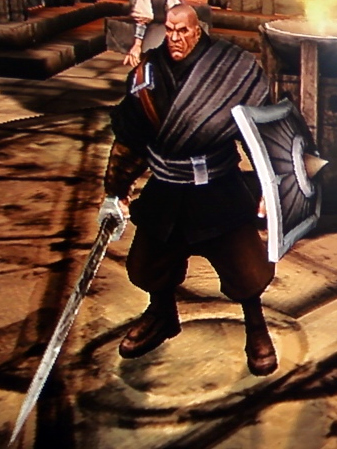
The Mercenary is a pretty straight forward and uncomplicated character; basically he is the muscle of the group. Equipped with a sword, shield and lots of brawn, he can handle almost anything. Having joined the group more out of chance than by choice he wants nothing more than to cut ties with his companions and go back to what he does best, fighting for money.
- Attack shielded enemies with your heavy attack to drop shields immediately
- Shields can be easily disarmed with the shield shield
- Upgrade your shield bash and slash attack quickly
- The heavy attack is very powerful, but also has its own auto lock feature, so you may not end up attacking the enemy in front of you
Controls:
Dash – A
Slash Attack – X
Heavy Attack – Y
Shield Bash – B
Block – RT
Pick Up Object – LT
Use Deployable – RB
Ultimate Power (whirlwind attack) – LB
Soloing:
The Mercenary has no ranged attack whatsoever, making him very difficult to solo in certain situations. Having ranged units on either side of him will put him at an incredibly vulnerable position. The trick to the Mercenary is lining up all the ranged enemies so he can block in one direction.
Another trick to staying pristine is using the right analog stick to aim the shield while also retreating. Trying to use the stun while being attacked will result in taking a hit, so back up first. The Mercenary’s Y attack is incredibly powerful and great for elites, especially if launched right after an attack, but never before. If perhaps an enemy might connect before the dash ends, just block the attack first. Upgrading the Y is great for defeating enemies, but to thin the heard keep the X high to eliminate as many threats as possible. At 20, the X attack can hit up to four enemies at once and doesn't suffer any damage reduction.
Cooperating:
This guy needs to be the second character in every pair of two or more. When working with the Wizard, the Mercenary is an absolute blast. Buff up his B (stun) and have the Wizard buff his Y (freeze) and just go to town on all the pleasantly frozen enemies. Whole waves of baddies smashed to frosty flakes with one might sweep of the shield. On top of that, the Wizard’s blasts don’t stop enemies from attacking, so stay close by and focus on an X and B combo rather than using the Y as it could leave the Wizard in a bad way. Working with the Assassin is the opposite however, where her stun will leave several enemies incapacitated for the Mercenary to deal massive damage to without fear of attack, so use the Y liberally.
The Assassin also has tons of elemental effects attached to her weapons, so using her B (dagger throw) to infect/burn/shock/etc. is great if combined with the Mercenary’s massive stun length when using the shield. On top of that, enemies that are stunned AND knocked down take absolutely massive damage from the Assassin’s backstab, making quick work of some of the ironically meaty undead elites later in the game.

No comments:
Post a Comment